Setting up a projector screen properly comes down to two things: getting the physical setup right and dialling in the image. When both are done well, the picture looks clean, sits correctly on the screen, and stays comfortable to watch for long periods.
Unlike TVs, projector screens are heavily affected by the room itself. Ceiling height, screen flatness, seating layout, and ambient light all play a part. Even small mistakes can knock image quality down quickly. That’s why, in professional AV setups, placement and alignment are sorted before anyone touches picture settings.
Below are practical, field-tested tips AV technicians use when setting up projector screens for meetings, conferences, and live events.
Choose The Right Location And Screen Type
Start by looking at the room, not the equipment. Ideally, you want a space where ambient light can be controlled. Blackout blinds or curtains make a huge difference, especially in venues with large windows. Once the location is sorted, choose a screen that suits the space and the type of event.
- Fast-Fold Screens
These are widely used for events and conferences. Fast-fold screens come in large sizes, often reaching 330 inches diagonally or more. They are designed for quick setup and breakdown and can be stored in transport cases.
- Tripod Projector Screens
Tripod screens are portable and common in classrooms, meetings, and smaller events. They are easy to transport and set up, making them suitable for temporary installations.
- Inflatable Screens
Inflatable screens are ideal for outdoor movie nights and drive-in events. Sizes can reach up to 40 x 20 ft, accommodating hundreds of viewers or dozens of vehicles. Matching the screen type to the room helps maintain brightness, contrast, and overall image clarity.
Determine The Correct Screen Size And Viewing Distance
Bigger is not always better. Screen size should be chosen based on the room dimensions and how far the audience is sitting from the screen.
As a general rule, viewers should sit around 1.5 to 2.5 times the screen’s width away. Any closer can feel uncomfortable, while sitting too far back makes the text and details harder to read. Measure the room first, then pick a screen size that feels balanced for the audience, not oversized for the sake of impact.
Get The Right Height
Projector position and height play a big role in how natural the image looks.
If the projector is mounted too high or too low, the image can end up trapezoidal, uneven, or pushed off the screen edges. That usually leads to heavy keystone correction, which is best avoided.
Common ways to achieve the right height include:
- Ceiling Mounting
This is a common permanent solution for conference rooms and home theatres. Adjustable mounts help match the projector’s throw and angle.
- Truss Mounting
When ceiling mounting is not allowed, truss systems offer a flexible alternative. They are available in different heights and weight capacities.
- Elevated Surfaces
Tables, shelves, or platforms can be used for temporary setups, as long as the projector is stable and level. Getting the height right early reduces the need for digital corrections later, saving time and improving overall image quality.
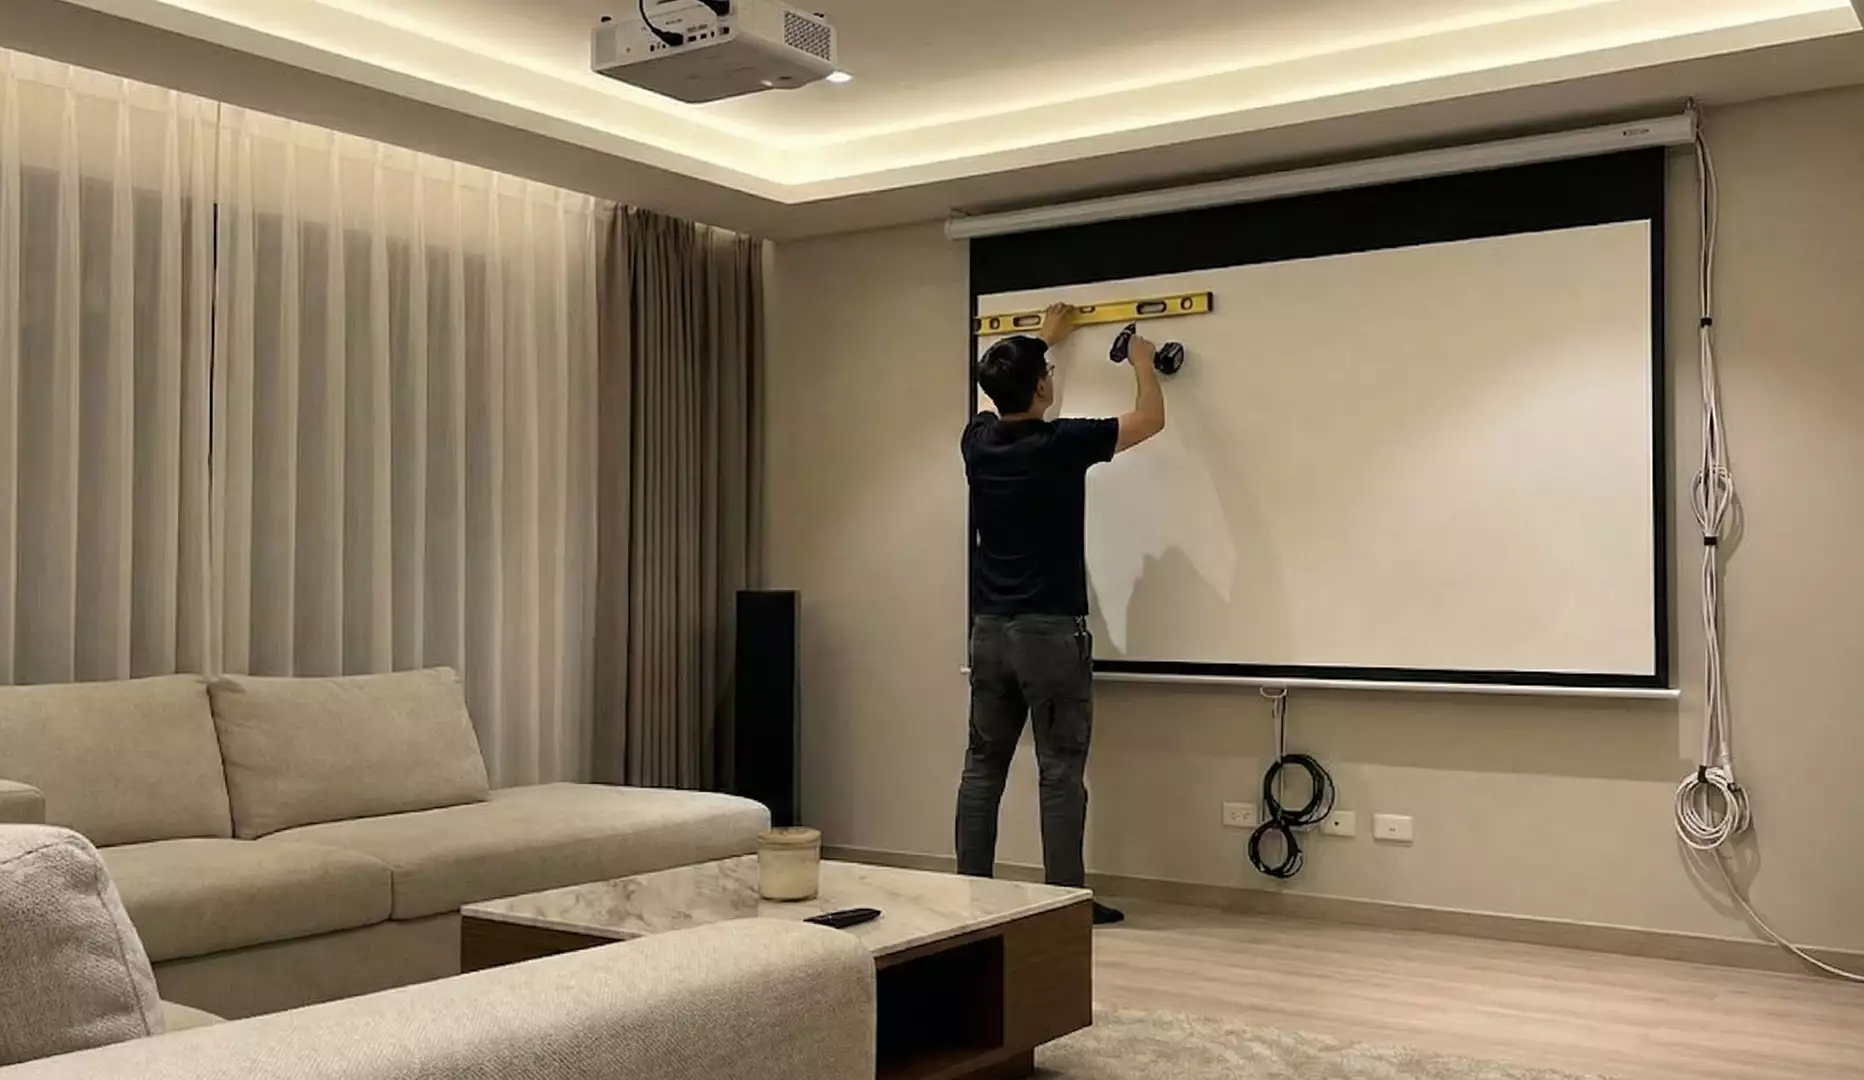
Mount The Screen Securely And Keep It Flat
Secure mounting is essential for safety and image stability.
Use a stud finder to locate wall studs or ceiling joists before mounting. Larger screens should never rely only on plasterboard fixings. Proper hardware keeps the screen level and prevents movement during use.
Equally important is screen flatness. The screen material should be taut and free of wrinkles or waves, as these distort the projected image. Always confirm the screen is flat before adjusting the projector.
Choose The Suitable Aspect Ratio
Aspect ratio refers to the relationship between the screen’s width and height. Matching the projector’s aspect ratio to the screen prevents black bars and image stretching.
Most projectors allow you to change aspect ratios in the settings menu.
Common aspect ratios include:
- 16:9 – Ideal for home theatres and video content.
- 4:3 – Suitable for legacy content and older presentation formats.
- 16:10 – Common for computer presentations and PC use.
Selecting the correct ratio ensures the image fills the screen properly.
Align The Projector Straight To The Screen Using A Test Pattern
The projector should be positioned so the lens is centred horizontally and vertically, and as close to perpendicular to the screen as possible.
Professional setups rely on alignment images or test patterns to fine-tune this step. These patterns help adjust height, distance, focus, and zoom while confirming that the image fits the screen edge-to-edge.
Check both the center and corners for sharpness. Physical alignment always delivers better results than electronic keystone correction.
Adjust Zoom, Focus, And Picture Mode Together
Once alignment is complete, fine-tune the image using zoom and focus controls.
Older projectors may use manual knobs, while newer models allow remote adjustments. Focus should be even across the entire screen, not just in the center.
After the focus is set, choose an appropriate picture mode such as Cinema or Movie. These presets balance brightness, contrast, and color more naturally than high-output modes.
However, brighter modes like Dynamic or lamp mode can increase fan noise and heat output. These should be used only when necessary.
Calibrate Brightness, Contrast, And Color Settings
Image calibration is where the setup comes together.
Adjust brightness so dark areas remain visible without washing out highlights. Set contrast to achieve deep blacks and clear whites. For color accuracy, use presets such as Cinema or Movie mode instead of overly bright display modes.
Balanced settings usually look more natural and are easier on the eyes.
Tweak The 2D And 3D Settings
Some projectors support both 2D and 3D content.
Certain models detect 3D automatically, while others require manual selection. Adjusting these settings correctly improves depth, clarity, and how smooth motion looks. Always review available image enhancement features and adjust them based on the content being displayed.
Integrate Sound And Manage The Environment
Audio should support the image, not distract from it. Speakers should be positioned around the screen so the sound feels aligned with the visuals.
Ensure the projector has proper ventilation to prevent overheating. Cable management is also important. Neatly routed cables improve safety and give the setup a cleaner, more professional appearance.
Test The Full Setup Before Use
Before any presentation or screening, test everything.
View the screen from different seating positions. Test slides, video, and motion content. Make small adjustments early to avoid last-minute issues. A short test run ensures the setup performs as expected.
Still Need Help? Consider A Professional Projector Setup
If setting up a projector screen feels complex or time-consuming, professional AV support can simplify the process.
Some rental companies provide full-service projector rentals and screen rentals for events of all sizes, including equipment supply, installation, operation, and de-rigging. Projector screens can support audiences of up to 500 people, with NEC, Panasonic, and Optoma projectors delivering brightness levels up to 32,000 lumens.
